


Introduction
This document is designed specifically during System Refresh for SCM system. This document will be helpful for SAP BASIS consultant to give all basic knowledge of SCM System Refresh. If we want to refresh our system legacy data with production data in quality or pre-production, we perform the system refresh. Example copying production data to quality or pre-production environment. Here production will be online during this activity.

SCM System Refresh:
In this process we copy the system from the production to lower environment like Pre-production or sandbox for below purposes.
Before any cutover/go live for testing.
Before Any upgrade of Enhancement package or support pack stack upgrade or version upgrade.
Companies want their SAP test system to look like their production system for better testing.
Pre-Steps
Step 1 Screen shot of some transaction to compare after refresh
STMS: Transport Domain, System Overview, Transport Configuration, Transport Parameter
SCC4: Client status open / close.
AL11: Transport directory location.
RZ03: Operation Mode, Current work process status, instance and startup profile location rom instance status
RZ12:
SMLG:
WE20: Partner profile.
SM59:
SS02:
SLICENSE for later use of Hardware Key
DB13
FILE
SLDAPICUST note which system
STRUSTSSO2 see which tickets are active
SECSTORE
Step 2 Screen shot of some table using SE16
EDPP1
RSBASIDOC
USR02 Number of entries (to compare after import)
V_TBDLS
RSLOGSYSDEST
RSLOGSYSMAP
TVARVC
V_CONVERTER
Step 3 SM37: download all BTC info into .XLS
Step 4 SPAD: Printer Export as .txt format
Step 5 Export Background Jobs:
Export tables: exp: then put in a dump file
TBTCA
TBTCB
TBTCCNTXT
TBTCCTXTT
TBTCCTXTTP
TBTCI
TBTCJSTEP
TBTCO
TBTCP
TBTCR
TBTCS
VARID
VARI
VARIT
VARIS
Step 6 RFC export:
RFCATTRIB
RFCCHECK
RFCDES
RFCSYSACL
RFCTRUST
Step 7 Export AL11 table USER_DIR
Step 8 SCC8 User Master Data Export
Users master data of that client exported so the user of production not reflect to the target system.
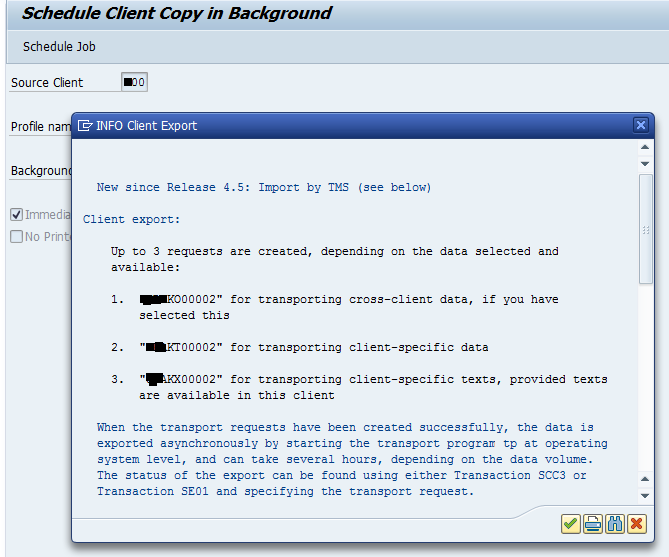
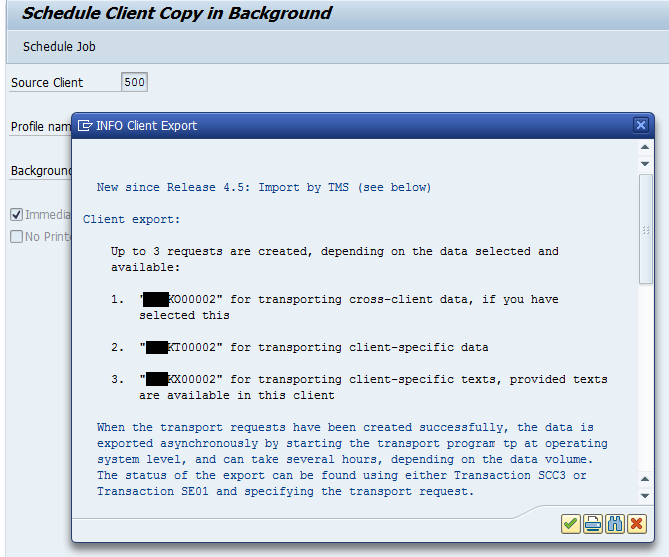
Up to 3 requests are created, depending on the data selected and available:
1. "XXXKO00012" for transporting cross-client data, if you have selected this
2. "XXXKT00012" for transporting client-specific data
3. "XXXKX00012" for transporting client-specific texts, provided texts are available in this client
STEPS:
1. SCC8
2. Choose profile SAP_USER and Target system as same client.
3. Schedule job immediately with no printer Dialog
4. Continue
5. SCC3 go to Export
6. Wait till finished.
Refresh Activity:
Removing data files of XXX & coping PRD data (user orasid)
cd /oracle/XXX/
rm -r sapdata1
rm -r sapdata2
rm -r sapdata3
rm -r sapdata4
rm -r origlogA
rm -r origlogB
rm -r mirrlogA
rm -r mirrlogB
cd /oracle/XXX/ (we are here only so no need to do it (user orasid))
scp -pr /tmpmount/sapdata1 . &
scp -pr /tmpmount/sapdata2 . &
scp -pr /tmpmount/sapdata3 . &
scp -pr /tmpmount/sapdata4 . &
scp -pr /tmpmount/origlogA . &
scp -pr /tmpmount/origlogB . &
scp -pr /tmpmount/mirrlogA . &
scp -pr /tmpmount/mirrlogB . &
Post Step
STEP 1 Create Control File on Source System
su – ora<Target SID>
sqlplus / nolog
connect / as sysdba
alter database backup controlfile to trace;
cd /oracle/SID/saptrace/usertrace
cp <latest-file>.trc SIDcontrol.sql
scp SIDcontrol.sql to Source system
STep 2 Edit Control File on Target System
Chown orasid:dba SIDcontrol.sql
Step 3 Login to database & recover the database from controlfile.
STEPS:
oraxxx>Sqlplus / as sysdba;
startup nomount
@/xxx/xxx.sql
Recover database using backup controlfile until cancel;
alter database open resetlogs;
alter tablespace PSAPTEMP add tempfile '/oracle/XXX/sapdata1/temp_1/temp.data1' size 540M reuse autoextend on next 20000000 maxsize 10000M;
Shutdown Immediate;
startup mount;
alter database noarchivelog;
alter database open;
alter database rename global_name to XXX
@/oracle/post_copy.sql
Step 4 We need to drop the “OPS$” users of PRD system & need to create the users with current SID.
STEPS:
1. Select username from dba_users; (it will show list of all OPS$ user and create this user again with XXX sid and provide the role related to it)
SYSTEM
SYS
OPS$SAPSERVICEXXP
OPS$ORAXXP
OPS$SR3ADM
OPS$XXPADM
SAPSR3
OUTLN
ORACLE_OCM
DIP
DBSNMP
APPQOSSYS
2. Drop user OPS$ORAXXP cascade;
3. Drop user OPS$XXPADM cascade;
4. Drop user OPS$SAPSERVICEXXP cascade;
5. Create user OPS$ORAXXX identified externally externally default tablespace SYSTEM temporary Tablespace PSAPREMP;
6. Create user OPS$XXXADM identified externally externally default tablespace SYSTEM temporary Tablespace PSAPREMP;
7. Create user OPS$SAPSERVICEXXX identified externally externally default tablespace SYSTEM temporary Tablespace PSAPREMP;
8. Grant DBA, Connect, Resource to OPS$XXXADM;
9. Grant exp_full_database to OPS$ORAXXX;
10. Create SYNONYS "OPS$SERVICEXXX".SAPUSER for "OPS$XXXADM".SAPUSER;
11. Create table "OPS$XXXADM".SAPUSER (USERID VAARCHAR2 (256), PASWORD VARCHAR (256));
12 INSERT INTO "OPS$XXXADM".SAPUSER ('SAPSR3', '*******');
13. Commit;
14. @Sapmnt/xxx/exe/sapconn_role.sql (it will disconnect SQLPLUS)
15.sqlplus / as sysdba;
16. @Sapmnt/xxx/exe/sapdba_role.sql SR3 (it will disconnect SQLPLUS)
17. logout
18. su - xxxadm
19. R3Trans -d
Step 5 Drop PRD tables & reimport the exported tables of the old system.
STEPS
1.sqlplus / as sysdba;
2.@/oracle/xxx/batch-table-drop.sql;
3.Drop table sapsr3.USER_DIR;
4. imp
6.sapsr3
7.*******
Step 6 After importing Old table data login to SAP & do post stepsSE06
Database copy or database migration
Do u want to reinstall CTS--> yes
Source system of Database copy--> XXP
Change original from XXP to XXX
Change the transport System not configured--> ok
Do u want to Change original from XXP to XXX --> YES
Delete TMS Configuration--> NO
Delete the original version of transport routes--> NO

Step 7 STMS: Restore as old system
System: XXX
Description: XXX SAndbox
Save
Step 8 BDLS: New logical system Name: xxxclnt500
Conversion of client dependent and client independent Tables
Table to be converted: **
Continue with conversion Anyway. YES
Step 9 Import user master
Step 10 Delete cancelled and Finished jobs
Go to SE38 Run RSBTCDEL. Execute in Background -> Create a Variant named “REFRESH” with the following properties:
Jobs from all users (*), Days 01, Fill three boxes at the bottom with ‘X’.
Be sure to check ‘delete with forced mode’
Save the variant, go a step back and click “Execute Immediately.”

Conclusion
The Refresh process will provide latest data in quality or pre-production environment which will helpful in rectifying error before production. I recommend to perform this activity every quarter or before any major changes and go live.